Sunday, August 26, 2012

Finished most of the details at this point. So here are some pictures of just that!


Saturday, August 25, 2012

Somethin' Brewin'

 I'm finally at a point where I think I'll be able to afford the materials to make masks on a regular basis and sell on ebay just in time for Halloween!

This mask is my interpretation of The Mask from the original comicbook, it's a 3/4 head mask so no neck.

I still have detailing to do, but it's mostly sculpted at this point.

Friday, May 25, 2012

Thursday, May 24, 2012

Latex Painting and Hair Punching 101 (really and not really, respectivly)

 He's been painted! The paints so far have just been Skin Illustrator pigments, I may or may not add some airbrushing with specially formulated airbrush paint, I'll have to sit with it for a little while and see what I like.
 Here is the beginning of two things, stitching and hair-punching. Starting out, I need to say a huge, mind boggling thank-you to my friend Martha, (deviant here: http://snartha.deviantart.com/) she grew her dreads out for a while, and eventually cut them off, and didn't know what to do with them, so she sent them to me for whatever I could come up with. Hair on it's own is kind of a funny thing to find, but real dreads are the rarest of the rare and honestly would be useless to few others. So again, thank you to MJ.
Hair punching is literally punching hair with a tool into whatever skin material you have, be it latex, foam, gelatin, or silicone. Technique varies based on the material, but the principal is all the same, use a tool to jam the hair in, in certain cases, glue on the other side. I'm not an expert in the subject for any material, but work by those who are is stunning to see, and watch being done.

Wednesday, May 23, 2012

Mold Pouring and Latex 101

Look at this! So, Latex, right... that stuff, I had to actually remember how to make it work the way I needed it to, and to again, have patience with materials that need to DRY. (dope slap's Mac from the past.)

ANYWAY, Latex in small amounts is an effective makeup material, it can be used for aging, small cuts and creating wrinkles. But it can also be used as an agent for the Halloween masks.

So once I finished my mold I poured about 1 cup of latex into it, and rolled it around inside. then filled the rest of it. I had a few little leaks but those sealed themselves quickly enough.  The latex was allowed to dry over about 24 hours.

The leaks create an edge around the mold called 'flashing'. This needs to be cut off the newly formed and dried latex head, but this can create a seam, which needs to be filled with a glue of some kind, in order to make a smooth edge.


Here is the head stuffed with cotton! still needs seaming, but this is the culmination of months of saving, scrimping and planning, it really means a lot to me to have this little freak of a head.

Saturday, May 19, 2012

Mold Making 101 (not really)

 I know that some of the two of you who watch this may know how all this is done, as you learned it with me, or from the same course, but some may not...

Molds are deceptively simple, they just require a certain kind of thinking. The big idea is to encase the object into a solid surface that will take it's impression, and then be able to open that solid surface whenever you want.
On a simple two part mold this is easy enough to do, by building a wall around the shape that you have created or want to make a replica of.

Then using some kind of plaster like material cover one half of the shape. It is important to keep a sharp edge between the wall that you made, and the shape you want to reproduce, this will help with seaming in the future (I'll discuss this in a future post).
 This image is of the head half done, there's a few things to point out here, I have removed my original wall that haloed the sculpt, and there are some 'dots' in the wall. These are called 'keys' and allow the two parts of the mold to fit together perfectly after it is made, so if it taken apart and put back together multiple times it'll still fit together easily and the same way every time.
The last step is to cover the opposite side in the plaster, the first half of the mold acts as the wall that was originally placed around the sculpt this time. Also I added two pry points into the mold giving me the option to poke something in to them and pull the mold apart if need be.

In a future post, I'll talk about some of the more troublesome aspects of mold making, like undercuts and seaming.

Monday, May 14, 2012

Getting Ready

 Hey! I'm back!

so in my life after my paying jobs... I have finally been able to get some plaster, and latex, so that I will be able to cast and pour my shrunken head!

I am VERY busy the next few days without much ability to cast the head in earnest, I still need to get some items that'll are required for casting it (bowls and the like). But I'm hoping by this time next week I'll be able to get what I need to make it all happen.

These pics or of the head in it's current state. I decided to get a few wrinkles on him just to add some character.

Tuesday, April 24, 2012

Downsizing!!

I am now announcing a new product for my Etsy store...
Custom Shrunken Heads!

This is just a simple example as a concept, but I'll be casting it shortly and pouring it in latex!

Thursday, April 19, 2012

The Aftermath

This is what the clay mask usually looks like when the paper machee comes off, and I have to pry it off and out of the now hardened paper.

This makes each mask unique, no shape can be duplicated honestly.

Also got some ideas in the works for some more advanced work coming up... stay posted!

Tuesday, April 17, 2012

I'm back!

So my last month, has been... chaotic to say the least... but now I'm back at it, and going to be doing my best to keep up with the work, if not for a client then just for myself.

Here we have the Lu mask starting to be papered!

Monday, March 26, 2012

Commish! Sculpt!

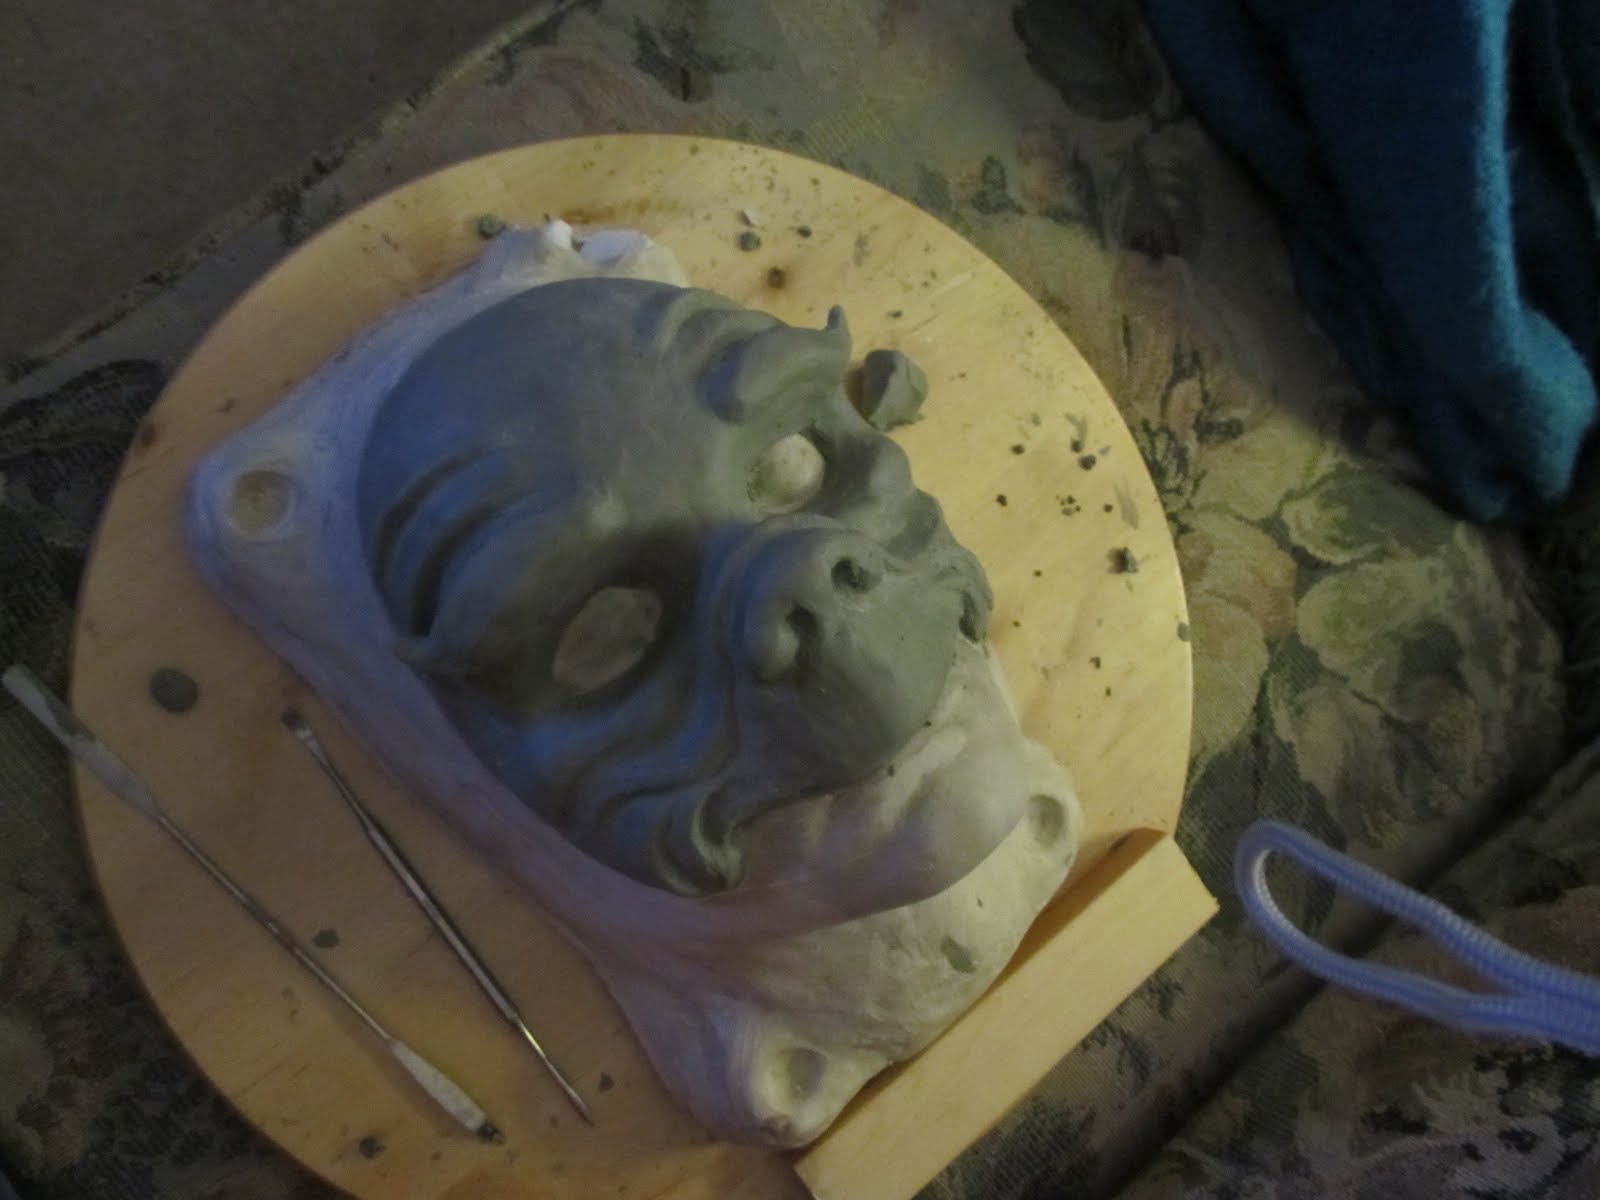
almost done sculpting, there's a few minor issues with proportion but more pictures when it gets cast into it's shell for molding!

Saturday, March 24, 2012

Commish: Latex head sculpt


Woo!! Been some radio silence around here because I've been busy with my other two jobs. But here is my latest commission in progress!

Monday, March 12, 2012

Repairs, preperations, and ... paper...

The Ogre mask is getting there.

The Oven worked well to solidify the paper, but the lack of Vaseline did not....

The paper of the mask ripped a bit in the removal from the clay, which is not idea, but because this is paper, it's simple to repair. A little more time with the machee some small pieces of paper, and some tape and it's more or less taken care of.

This one also has a newer feature, because I know that this mask will be worn, and will be used in a performance, I decided to add some metal into the edges of the mask where the ribbon will be attached to travel around the head.

still have a way to go on this mask, some sanding, gesso, and paint, but this one is turning out really really well compared to the last one, no buckling like the Who mask!

Papier Machee Cake!

I didn't disappear!!

Wow... ok... been a few days. Been a busy person, in a number of areas, but now I'm back and I have an update on the latest, Ogre mask...

Yes... I shit you not, the oven. I am baking paper, on clay... with chocolate chips inside...


ok no... no chocolate chips, that'd be awful and a good waste of chocolate, and I'd have to pick them out of the clay later.

The reason for this insanity is to try and dry out the glue that has been impregnated into the paper around the mask. The next step is to pry this mask off it's form which might prove more interesting than previous attempts. I had such failure with the cracking on the last mask, and despite my attempts to repair it, I decided to for-go the use of a 'resist' on the clay before laying down the paper.

This new removal of a step has so far worked, the paper does not show signs of weakness right now and no major rippling has occurred which was something that was the downfall of the last one.

Up next is a new commission for a bit more of a larger project... pictures once the sculpt has started...

Monday, March 5, 2012

Ogre Sculpt


Sculpting is fun! Horns, teeth, details... I seriously hope that I will be able to maintain as much detail in the paper machee as has been put into the sculpt of this.

2nd Commission!

Another co-worker has commissioned a mask for a concert he is performing in! Super excited for this one...

this one has a bit more of a set timeline so those waiting for the Lu mask will have to wait for an update once this one is finished.

Thursday, March 1, 2012

Who finished?

To say that I was 100% happy with any of my own work would be a fabrication, there is always something that doesn't sit quite right, but from that I learn.

With this mask however, I have learned many... many... many things, there is a lot in this mask that I am not satisfied with, and things that I am going to try and improve on. I'm thinking that I will even put this up for a bit less than I usually would charge in my Etsy store just because I couldn't feel responsible asking for my usual amount.

There are things which I am happy with in this mask, I feel that the layers of colours in the skin tone has worked, I am working on how to apply a spatter pattern with an airbrush compressor that doesn't provide as much power as I would like. Also to be more mindful about how to lay the paper more effectively when constructing the mask.

The commission mask is coming up next! stay tuned!

Tuesday, February 28, 2012

Commission: the Luuuuuuu

So a co-worker at work has a relative that she has commissioned a mask for! This kid is a huuuuuge hockey fan, so I get to make a mask of the Canuck's star goalie!

I've done my best to create a similar look based on reference material, and then the hockey helmet, somehow I'm gonna have to create the face guard, but I'm sure I'll find something...

Who mended...

So after some ... patience... and a fair bit of Gesso and sanding, we have a somewhat repaired, and now primed mask. Paint soon to come.

Also some happy news, I have been commissioned to make a mask as a gift for a friend's cousin! Sculpting to start shortly, and fresh pictures as they become available.

Monday, February 27, 2012

Who's not perfect?

So I'm not sure what exactly went wrong in the construction with the papier machee, I think it might have been something to do with the direction of the paper, and how it was layered... or perhaps it didn't get a full chance to really dry, but there was a rather large crack around an area of the mask.


I am now in the process of working out a fix for it, between some back filling with papier machee on the inside of the mask, and using some Gesso on the front in order to cover the crack this will strengthen it all in the long run, but it makes me worry about making this mask as smooth as the others.

However this does give me an opportunity to learn about how the paper needs to fall, and the layering of the mask, oh and the aforementioned patience in the last post... something I've never been really all that good at.

Gess-who?


Gesso! this is the first layer so there's still a lot of work to do with making it smoother, especially around the edges, but I'm happy with how the character has come through in the mouth and cheeks.

I keep playing with the order of operation with the masks, in order to determine how to make the strongest mask. This time I have started to Gesso before I pull the mask off, allowing the mask's papier machee to fully set and strengthen up.

I have found that using this oil based clay to be a little problematic, for this strengthening actually. The oil clay when warmed sweats, and in finding ways to speed the drying of the paper (with heat) it causes the clay to become wet, making the paper weaker.

Perhaps all I need to learn is patience...

Another element that I have introduced with this mask that I haven't had much of before is a real undercut that might compromise getting the mask off it's mold, so stay tuned for that, the pull off is coming up soon!

Saturday, February 25, 2012

Paper Who!

First layer of Papier Machee! this one has some smaller detailing which I usually try to avoid but I really wanted the character in the nose and cheeks to come through with this one.

When sculpting this one it felt more like I was designing a prosthetic makeup than a mask, which I suppose is a good thing, also as I was sculpting it I couldn't help smiling as I was working on it... maybe this one will stay with me when it's done...

... maybe not... more to come!

Friday, February 24, 2012

Who?


New sculpting! this is inspired by Dr. Seuss illustrations, and also credit goes to Kat for this one on suggesting the eyebrows in order to help bring the whole mask together.

Friday, February 17, 2012

Quasimodo - paint


The painting of these masks, usually happens quite quickly, and sometimes, but not always I'll have an idea of what I want the colours to reflect about the mask.

The first mask 'A Happy Fellow' I knew I wanted bright colours into black, but with this one, because it was based on a character from literature, I knew I wanted it to reflect that character honestly. Doing some reading on Quasimodo and who he is I wanted something ugly, but that still showed the inspiration that he still maintained and embodied. His ability to learn despite his various maladies, some of which are natural, and some of which have been given to him from simply the passing of his life.

So now I ask, is this Ugly? Beautiful? Inspiring? Defeating? Morose? or Intriguing?

Only one more step, and that is to seal it in Tremclad, then it'll be posted to Etsy!

Wednesday, February 15, 2012

I ♥ Gesso


I bought some Gesso in an attempt to have a better medium to smooth out the mask before I paint it with some colour.

And I looooooove it, a few layers of sanding and painting on the gesso is going to make this thing really sing.

Sunday, February 12, 2012

Saturday, February 11, 2012

Quasimodo - sculpt


So that last sculpt turned into something! after a few days it finally resolved into a Quasimodo mask. Papier Mache will start soon!

Wednesday, February 8, 2012

New one...


Here's a fresh start, not sure where this one is going yet, but I've had a few ideas about themes and stuff like that.

but for now...

Tuesday, February 7, 2012

The Heavy Brow: finished


here is the final paint-job on 'Heavy Brow', I wasn't sure how I really wanted to take it, but I knew I wanted it to be blue in tone, but the mask in reality has greens, and blacks, and a lovely blue-brown pigment that I picked up during my time at VFS for Makeup.

Monday, February 6, 2012

The Heavy Brow - before paint

This is the mask just before painting. I have done my best to smooth it out with some drywall filler, but honestly, I seriously need some gesso...

Total Pageviews